Windows 11 (EN)
Automatic installation
Download the PrintFIT printer driver and installer archive from this link.
Varování:
When downloading a file, your browser may warn you that it
may be a virus or malware. Confirm that you want todownload the file anyway.Since the file in the archive is not digitally signed, even Windows Defender or other antivirus can detect this suspicion after unpacking the archive.
- Run the
PrintFIT.exefile, which is located inside the downloaded archive. - Confirm to run the program as an administrator.
An installation window in
Windows PowerShellwill be launched, where the installation will take place. - When finished, choose whether you want PrintFIT set as your default printer in the pop-up window.
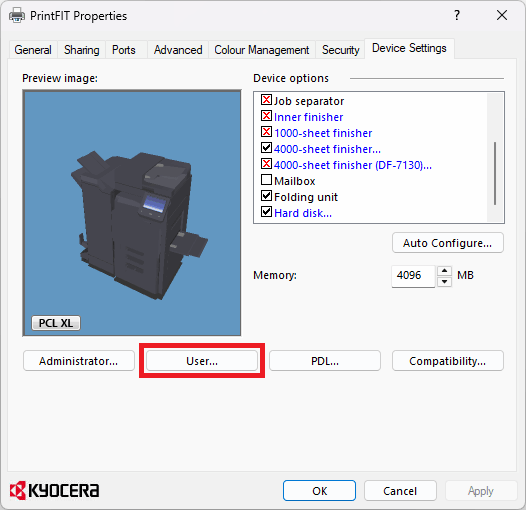
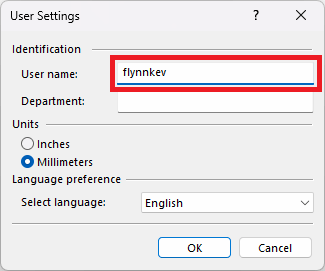
- The printer properties window will appear. Go to the Device Settings tab and set your CTU username here using this procedure.
- Close the printer properties window with the OK button.
Detailed manual installation
- Download
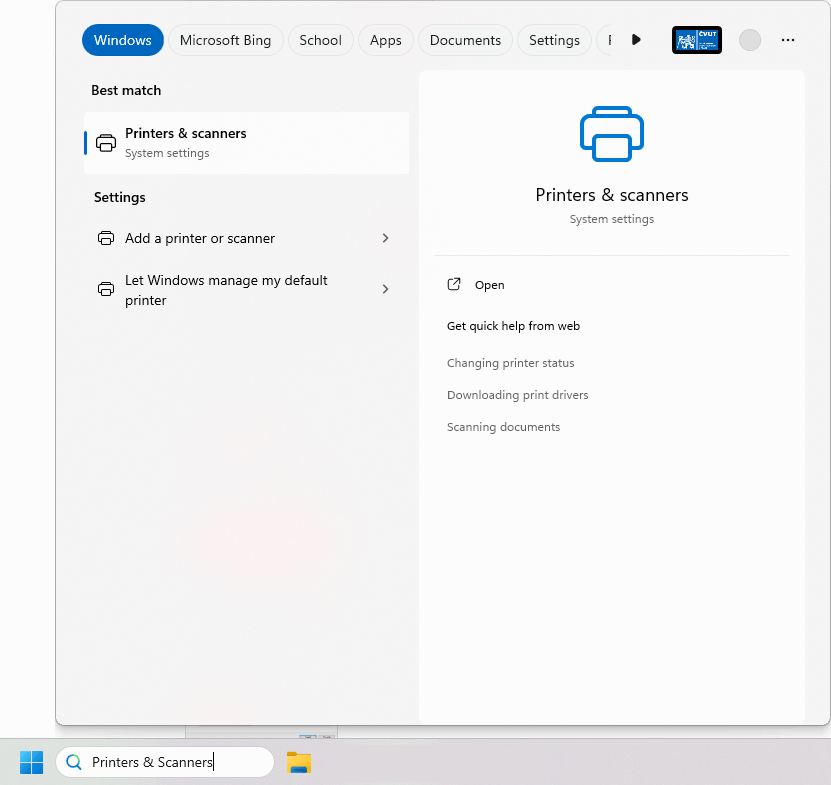
KX_Universal_Printer_Driver.zipdriver file from https://www.kyoceradocumentsolutions.eu/content/download-center/eu/drivers/all/KX_Universal_Printer_Driver_zip.download.zip. Open the Printers & scanners window using the Windows search box.
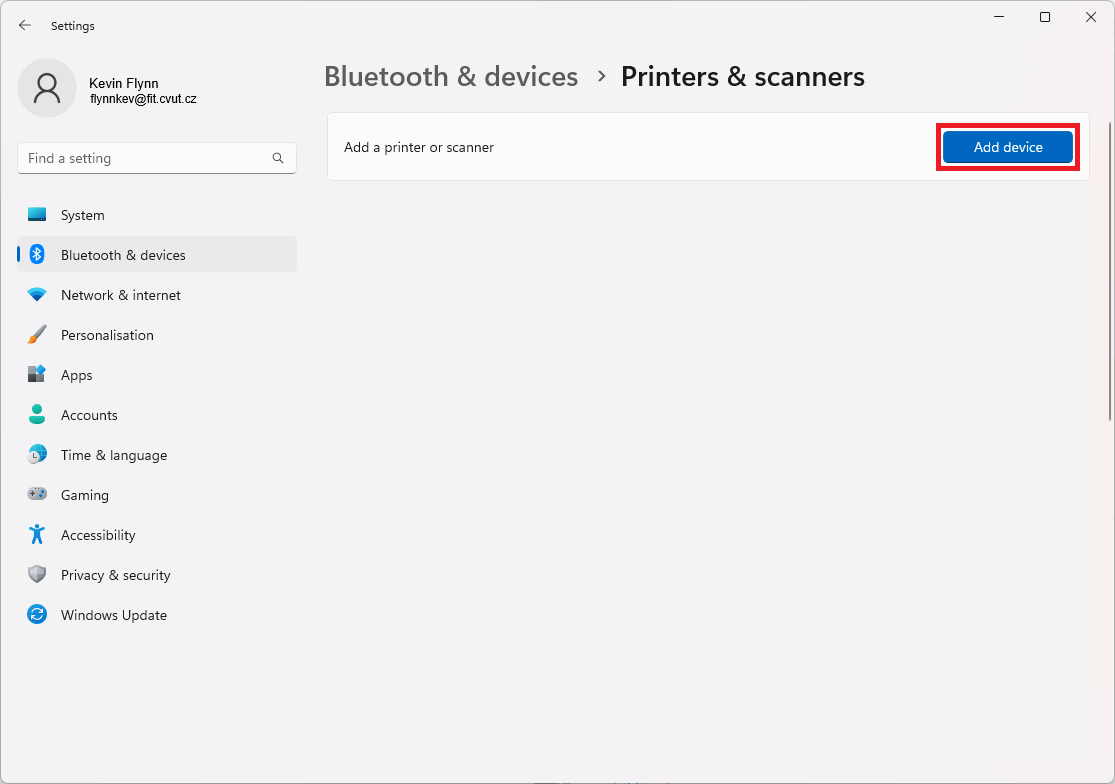
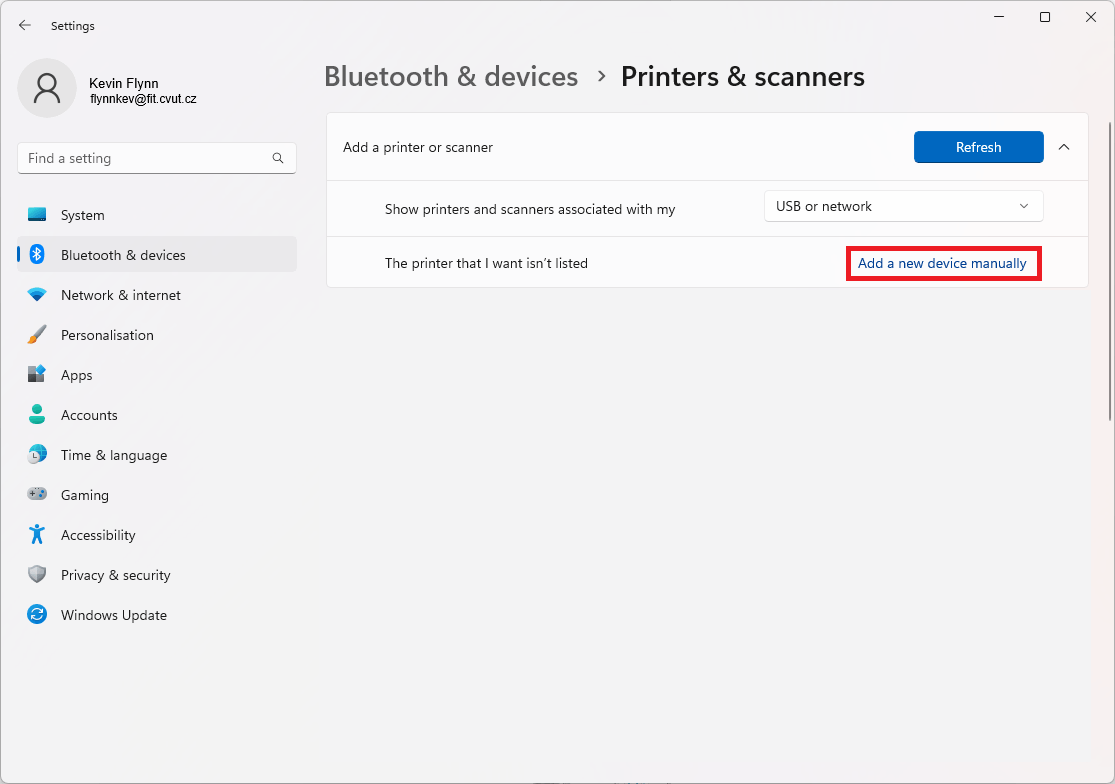
Choose Add device.
Select Add a new device manually.
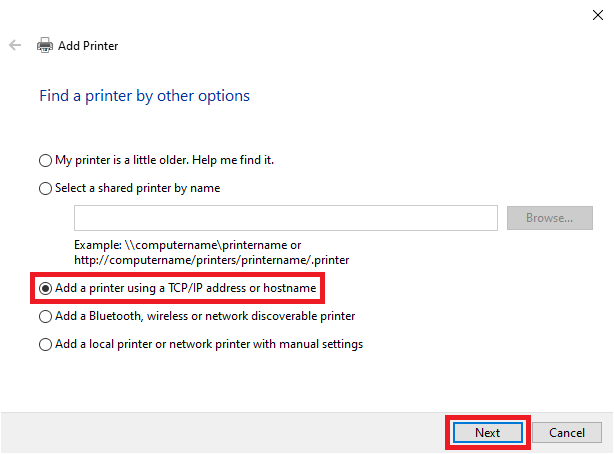
Select Add a printer using a TCP/IP address or hostname.
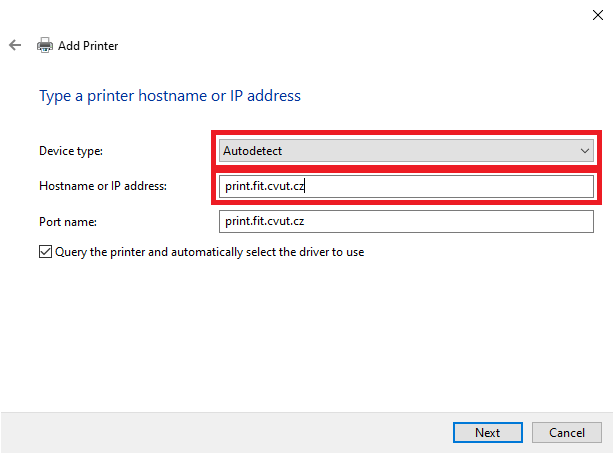
Select Autodetect as Device type. Fill in the field Hostname or IP address with the value
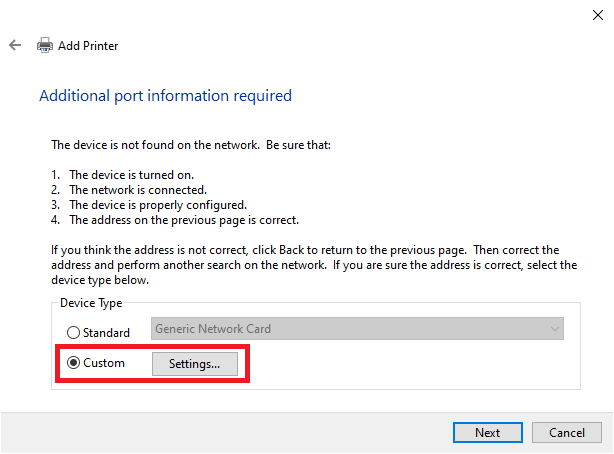
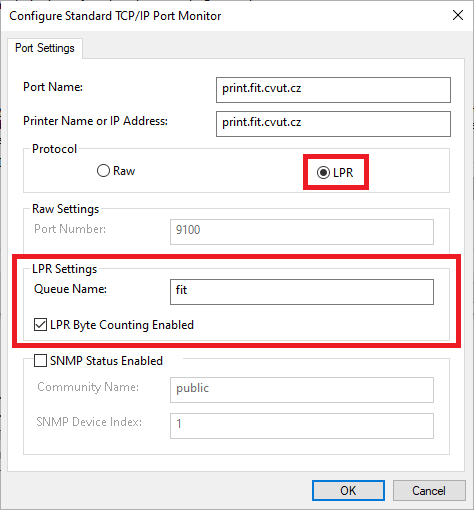
print.fit.cvut.cz.In the Device Type section, select Custom and press the Settings… button.
In the Protocol section, select the
LPRoption, and then in the LPR Settings section, enter the valuefitin the Queue Name field. Don’t forget to check LPR Byte Counting Enabled.Confirm OK and continue.
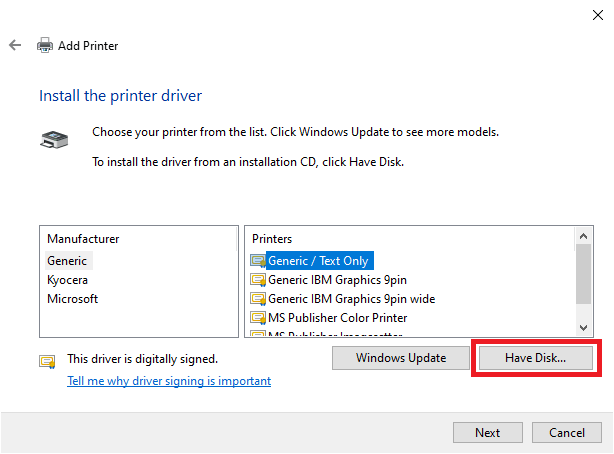
Press Have Disk… to continue.
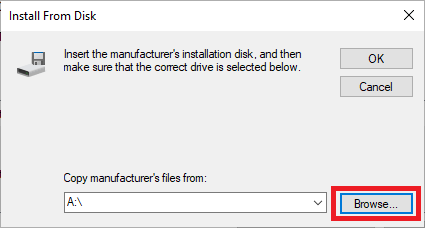
Press Browse….
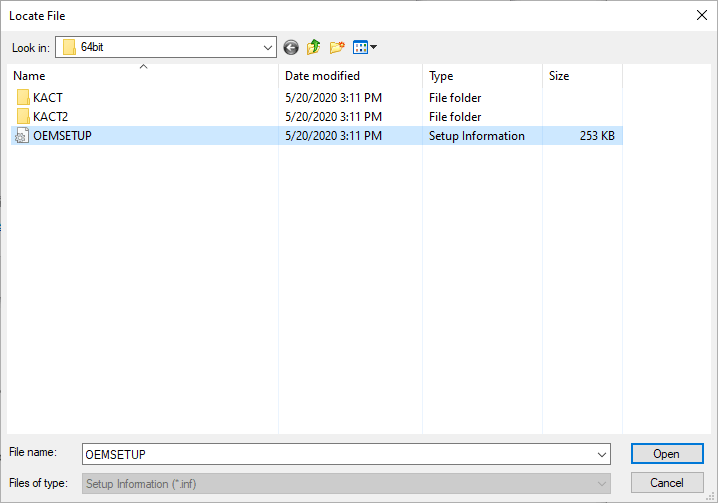
Open the folder with the downloaded drivers, proceed to en\64bit or en\32bit (depending on your architecture), and select the
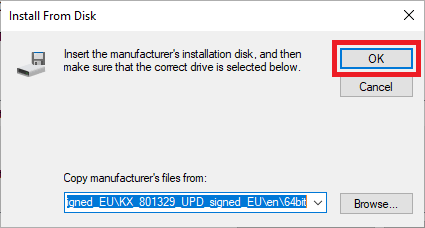
OEMSETUPfile.Confirm OK.
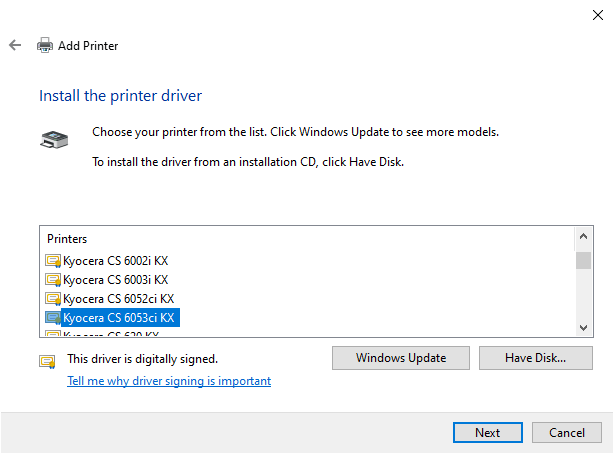
Select the Kyocera CS 6053ci KX option.
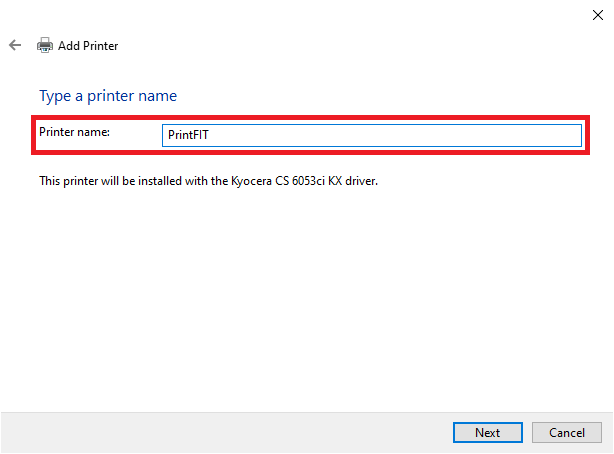
Continue by naming the printer. Choose a name of your choice, for example
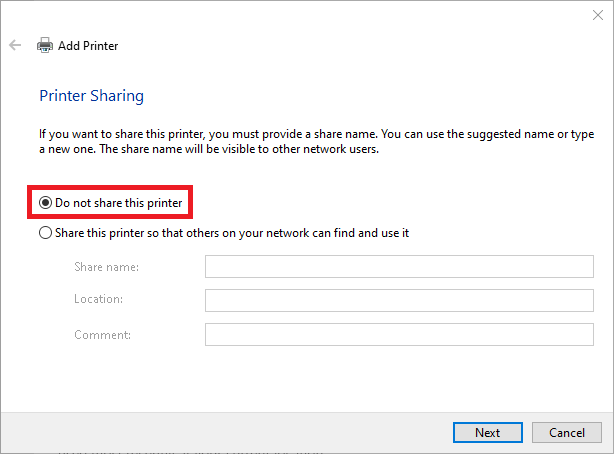
PrintFIT.Disable sharing by selecting Do not share this printer.
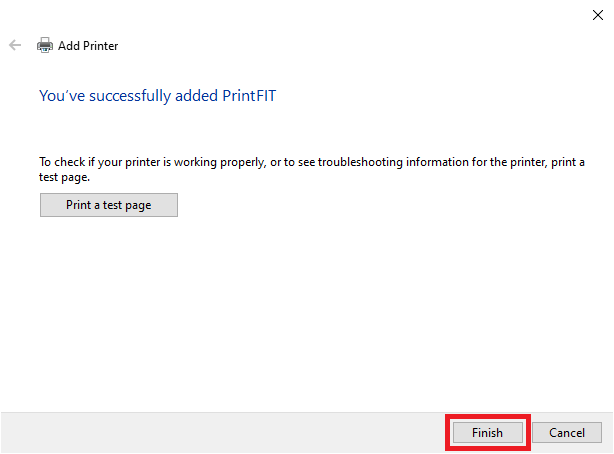
Confirm by selecting Finish.
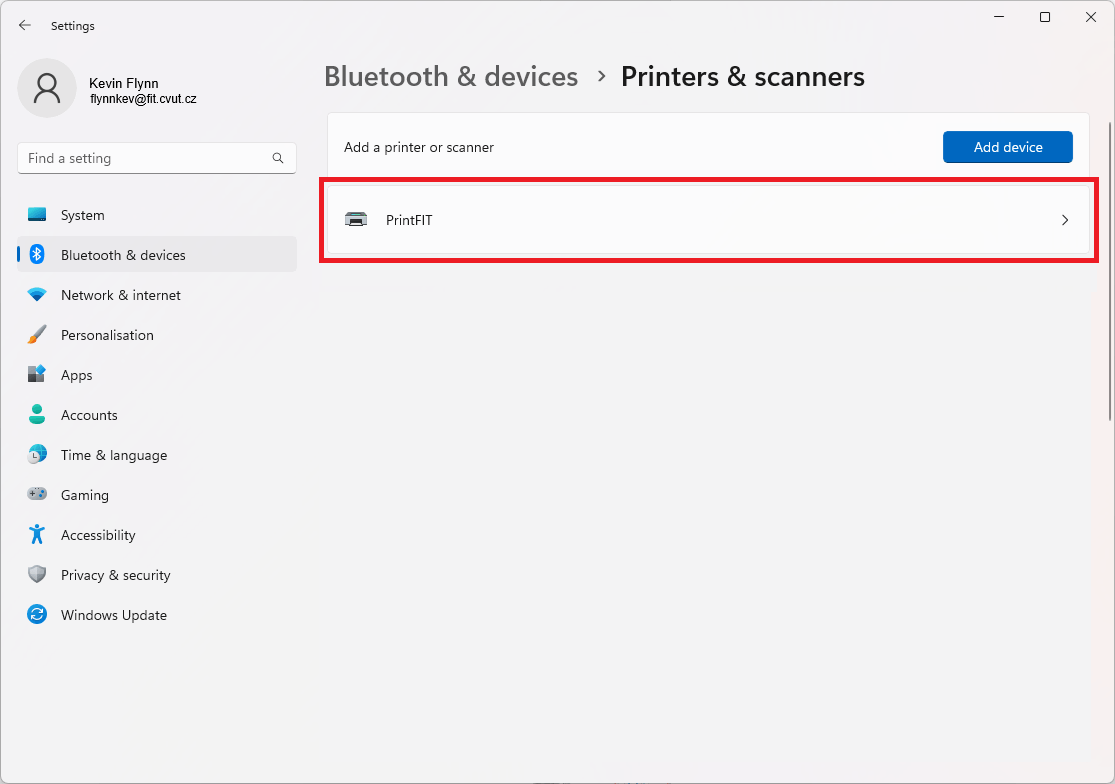
There is now a new printer under the selected name in the printers menu. Click on the new printer.
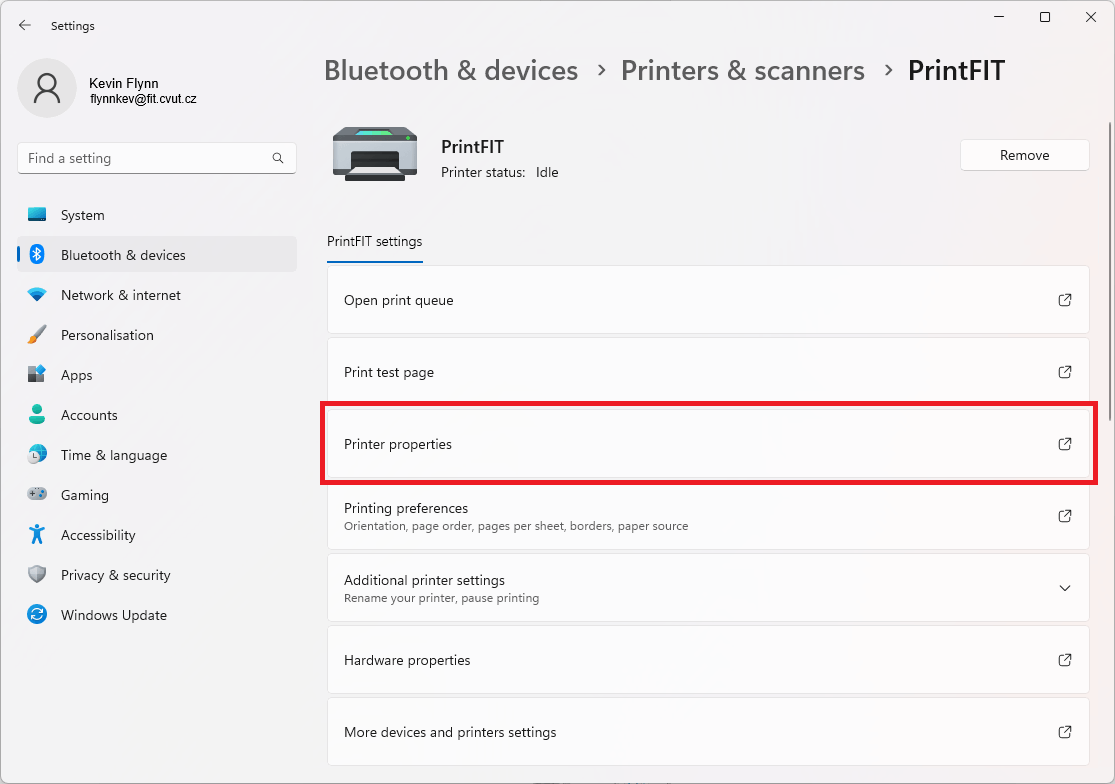
In the menu select Printer properties.
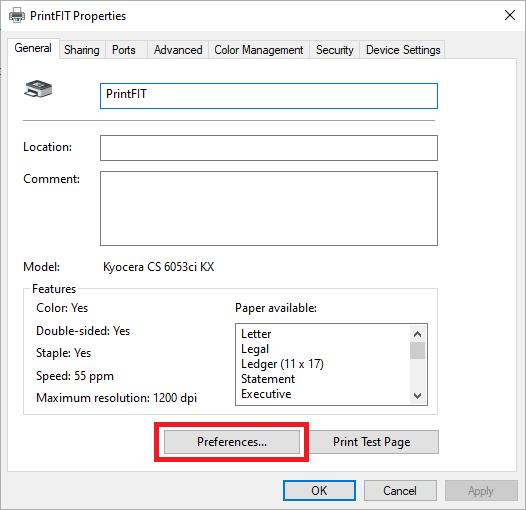
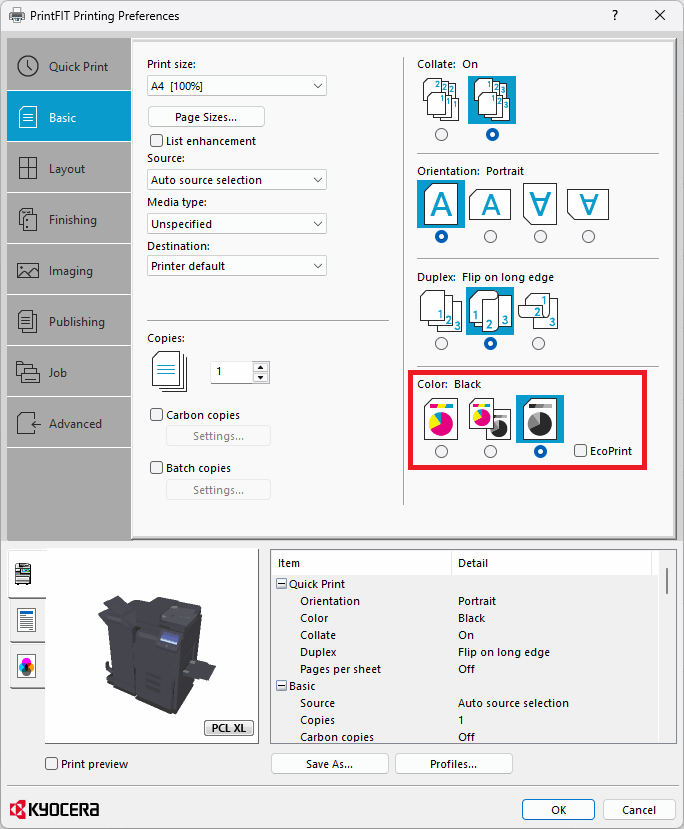
Press Preferences…
In the lower right section, set the default colour to Black. Confirm the choice with OK.
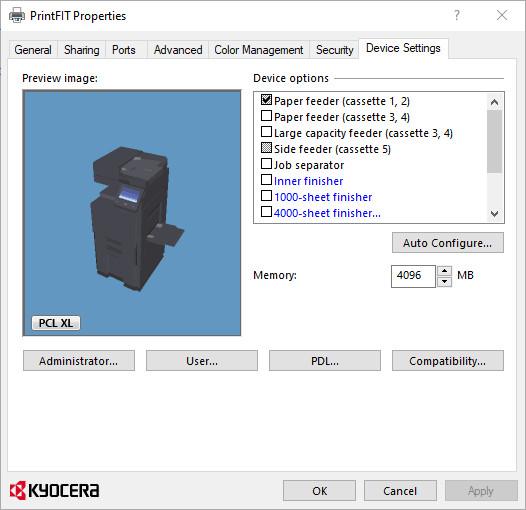
In the initially displayed window, switch to the Device Settings tab.
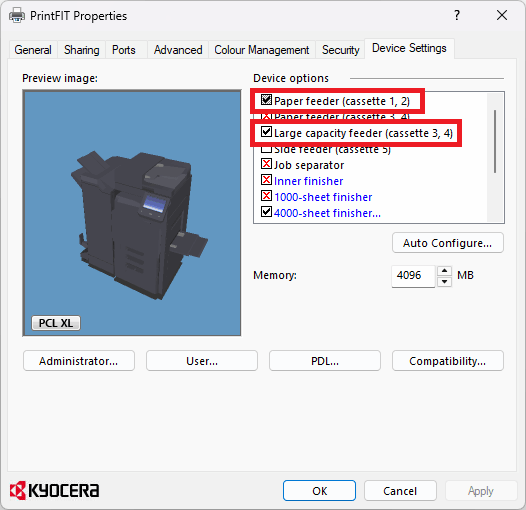
In the Device Options menu, check the following options:
- Paper Feeder (cassette 1, 2)
- Large Capacity Feeder (cassette 3, 4)
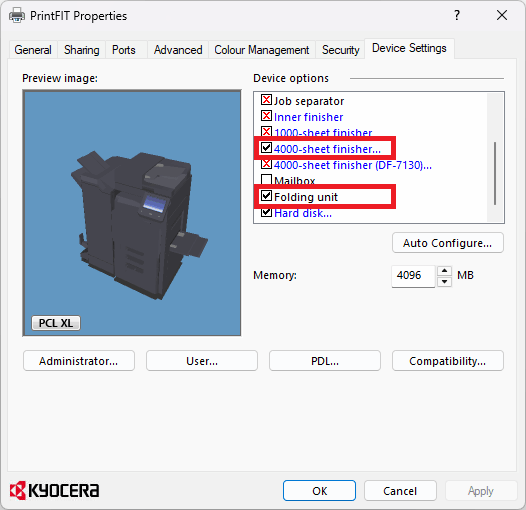
- 4000-sheet Finisher…
- In the Punch Settings pop-up window, choose 2 and 4 holes
- Folding unit
If the name of your user account in the system is different from your CTU username, use the following procedure, but without guarantee.
Upozornění:
On the part of ICT, for trouble-free printing, only settings are supported where the name of your user account in the system is the same as the assigned username of CTU.
Click the User… button.
Enter your CTU username in the User name field. Confirm the choice with OK.
The printer is now set up on your computer and can be used normally. When printing a document, select the
PrintFITprinter.The document is uploaded to the print server. To print, just go to any printer and authorize yourself.
Advanced printing settings
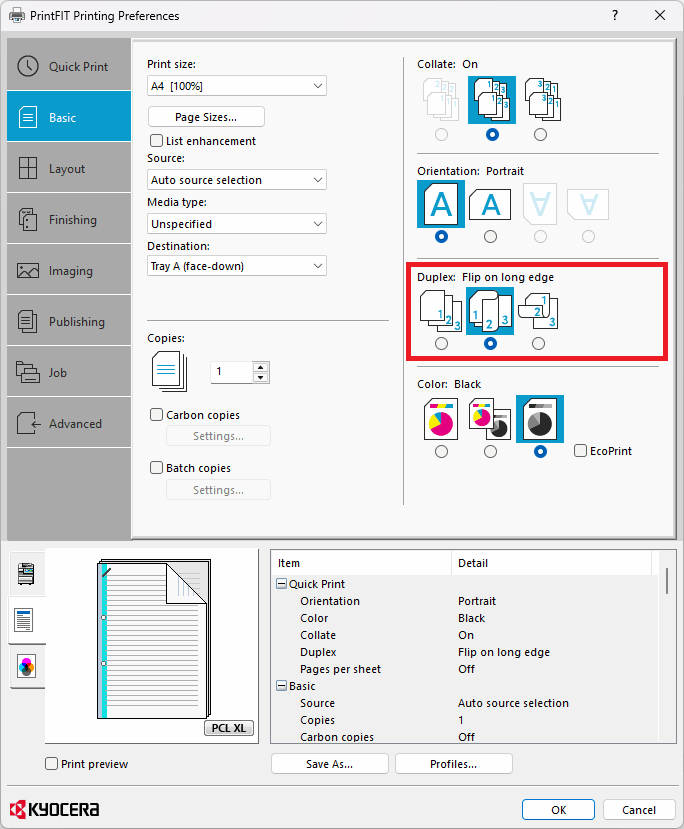
Two-sided printing (duplex)
In the Kyocera Print Panel application, select the Basic panel.
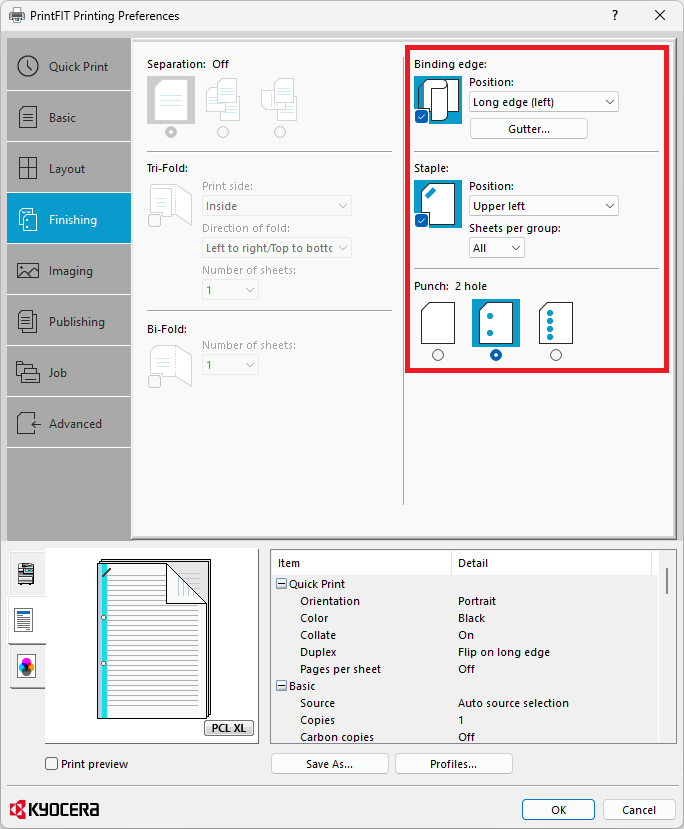
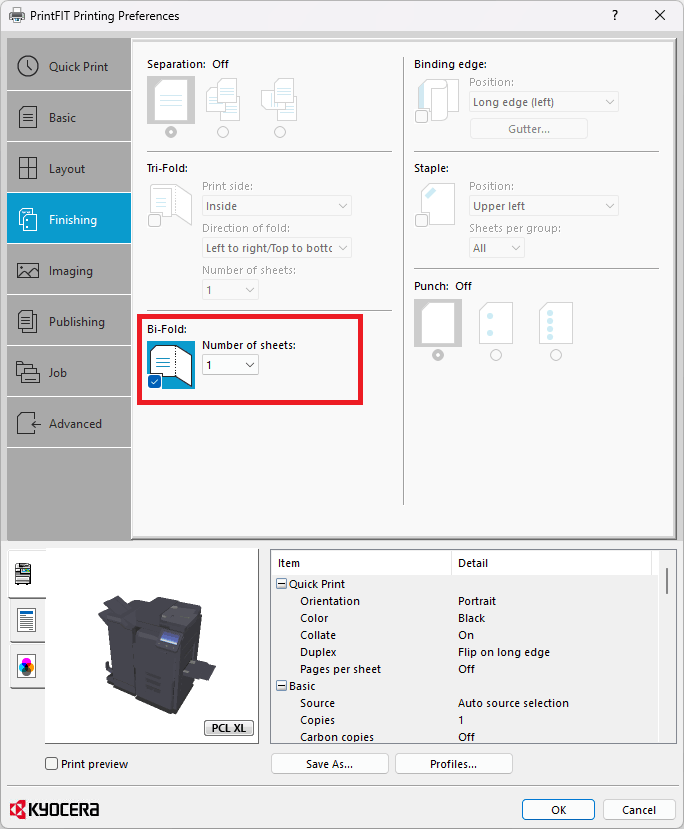
Stapling, punching and folding
In addition to printing, large-format printers can also be used for stapling, punching and folding.
When printing a specific document, select the PrintFIT printer, press print preferences and go to the Finishing section.
